Brandy Snaps ©
There is nothing more delicious than home made “Brandy Snaps.” I first discovered them at the age of nine, when I was invited by an English family for a sleep over……ever so exciting…..The mother, for tea, suggested ‘We’ make “Brandy Snaps!!!!!” This was too thrilling for words……..
I never forgot the “Brandy Snaps,” and the tradition followed on when I had children and right up to this very day!
The History is interesting too, because contrary to belief they have no ‘brandy’ in them! Click on the ‘wikipedia’ link below…….
http://en.wikipedia.org/wiki/Brandy_snaps
For Henry John and Irene!

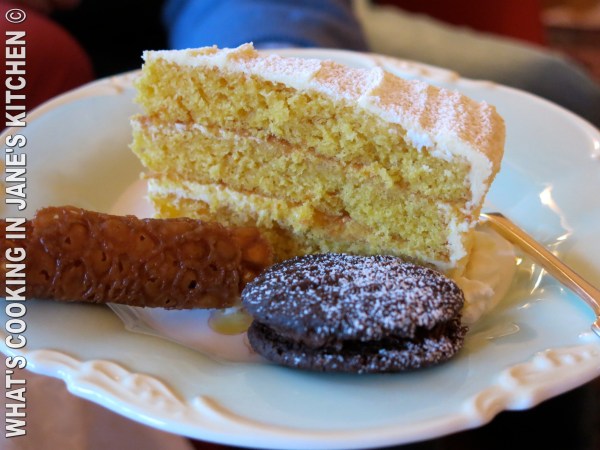
Orange Cake and Chocolate Biscuits and Brandy Snaps! YUM!!!!
Makes 20
Oven 180.C/ 350.F
Ingredients
65 g butter
60 g light brown sugar ( small granules )
55 g Golden Syrup
60 g plain flour
Pinch of Ginger powder
For Filling
150 ml heavy cream or whipping cream
50 g shelled lightly roasted pistachio nuts, finely chopped
Method : Pre-heat oven 180.c/350.F
1. Brush two baking trays, sparingly with butter. Weigh out your ingredients.
2. Place a small saucepan on your scales, zero scales and pour in golden syrup. Remove saucepan from scales and add light brown sugar and butter.* If you use the darker sugar, you won’t be able to judge when they are cooked so easily.
4. Stir gently over a low heat, until sugar crystals dissolve. This can take up to ten minutes.
5. Sift flour together with powdered ginger and add to your saucepan. Gently stir in the center of your saucepan, bringing in the flour bit by bit, this way it does not create lumps.
6. Place mixture in bowl and place in refrigerator for 20-30 minutes, or until mixture is firm.
7. Using a teaspoon place a walnut sized amount in the palm of your hand and roll into a ball.
8. Place at 10 cm intervals on baking trays. It is best to bake one tray at a time, so that the rolling procedure is easier.
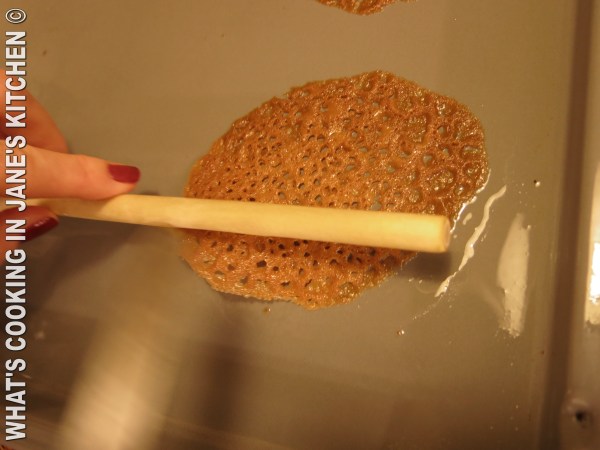
9. Place in oven and cook until “toffee” colored. Your ball will spread out and become ‘lace-like.’ * You don’t want to undercook them or they will be soft, nor over cook them to dark caramel or they will be bitter. See color in photograph. 5-6 minutes.
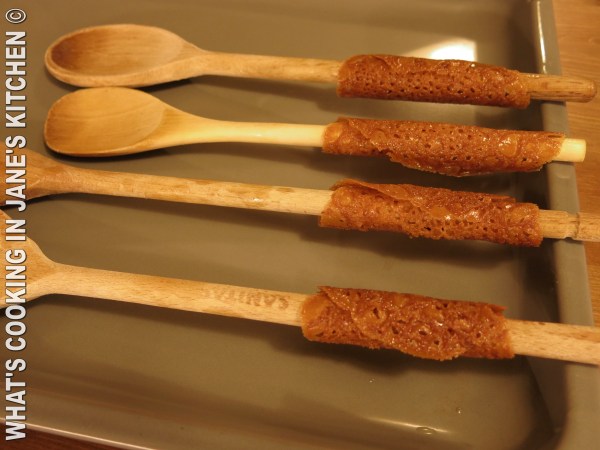
In the mean time oil 4-5 wooden spoon handles and lie against the side of your oven tray.
10. When your brandy snaps are ready remove from oven and wait 2-3 minutes. As soon as you can pass a ‘spatular’ underneath them to unstick them, then quickly lift and wrap round spoon, giving a light squeeze to your brandy snap to seal it. Lay spoon against side of roasting tin to cool. Proceed quickly to rolling the rest. If they harden too quickly, replace tray in oven to soften Brandy Snaps for a minute. Remove from spoon handles and place on wire wrack to go completely cold.
*It takes a few times to get it right and a ‘non-stick’ soft spatula helps when they are very hot. See photographs.
11. When completely cold, if not using straight away, store in air tight container. You can store them up to a week, so they are great for making ahead of time.
12. When ready to serve, maximum 20 minutes before hand, using a piping bag with star nozzle, fill with stiffly whipped cream and dip ends in finely chopped, lightly roasted pistachio nuts. To roast pistachios, peel and place under grill on a baking tray until just browning, careful they easily burn, keep your eye on them! Then finely chop.
Cook’s Tip: These are a ‘real treat’ and if you choose to fill them with berries or ice-cream, you can lift your brandy snap over a small oiled ramekin and press down to form a cup shape.

This is what you are aiming for……..
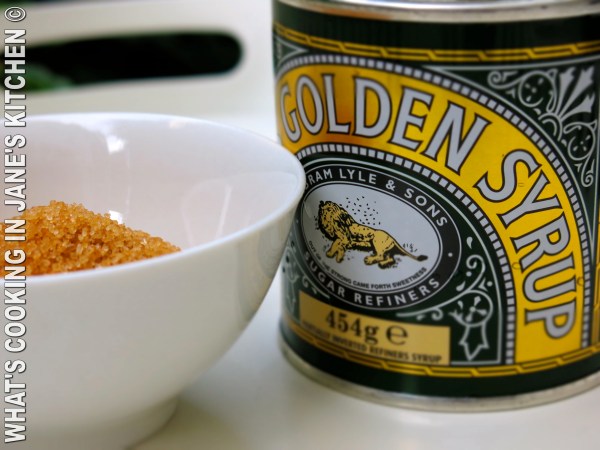
Measure out your ingredients. * Golden Syrup out side England to be found in International Food Stores.
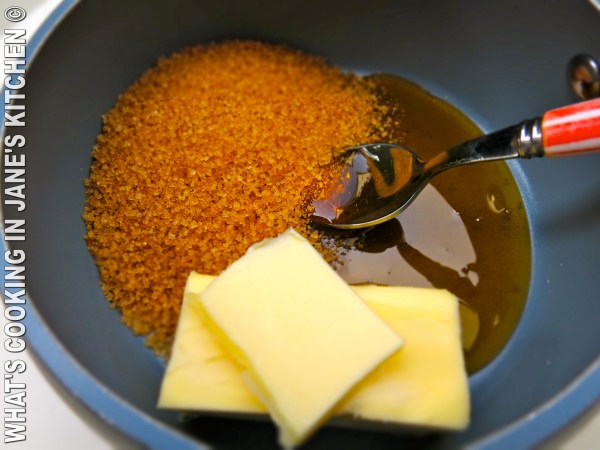
Place saucepan on scales, zero/tare and pour in Golden Syrup. Then add weighed light brown sugar and butter.
Place over medium heat and stir until sugar crystals are melted. This can take up to ten minutes.
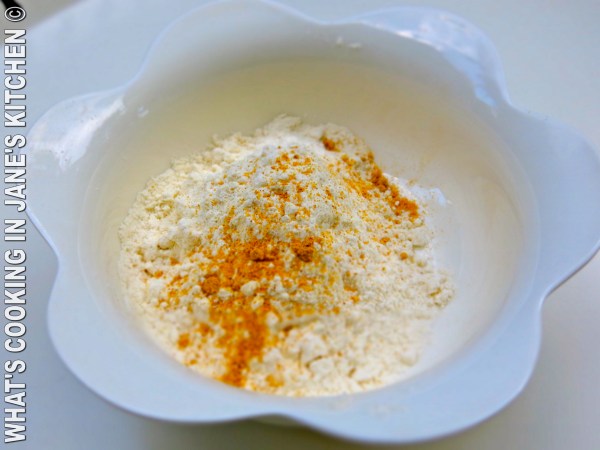
Sieve plain flour and ginger (powder) together and mix well.
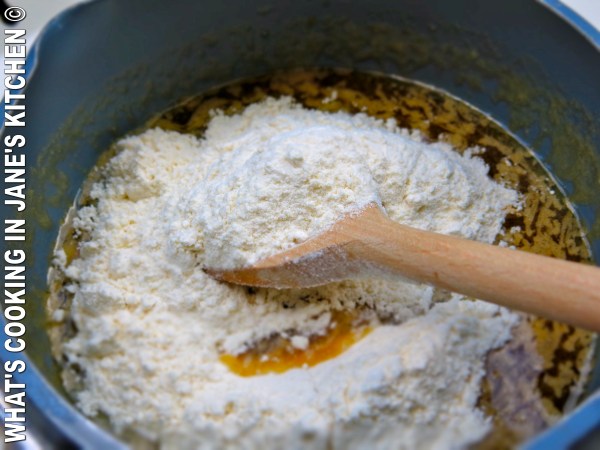
Once sugar has dissolved, add flour and stir in the center with a wooden spoon until all the flour is incorporated.

…….like this.
Place in bowl and leave in refrigerator until solid. 20-30 minutes.
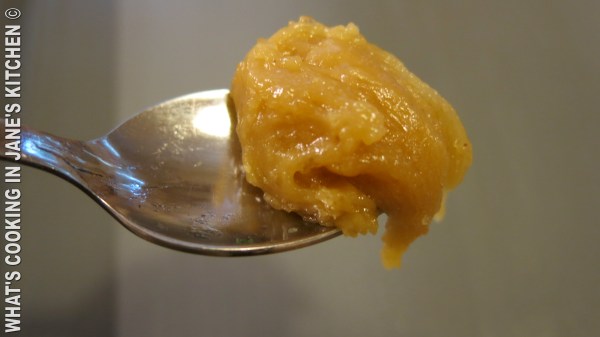
Using a teaspoon remove a walnut sized amount……

….and roll into a ball in the palm of your hand.
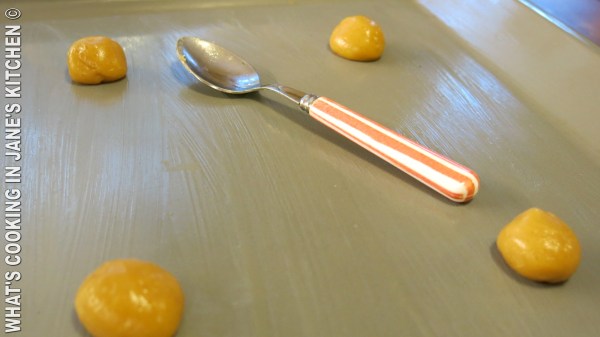
Place on buttered baking sheet 10 cm apart, as they spread when they melt. Bake one tray at a time, so as to have time to roll them. The teaspoon is to give you an idea of size. Remove and place tray in pre-heated oven.
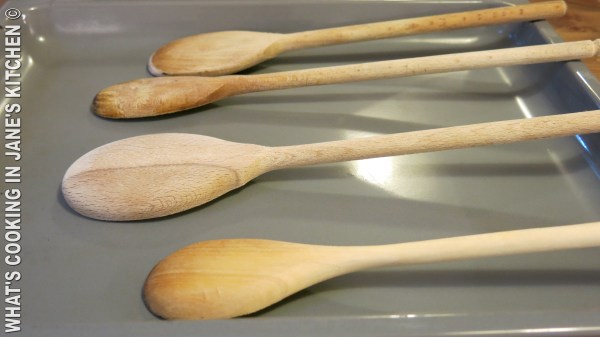
Lay out four wooden spoons standing up on baking tray and oil handles.

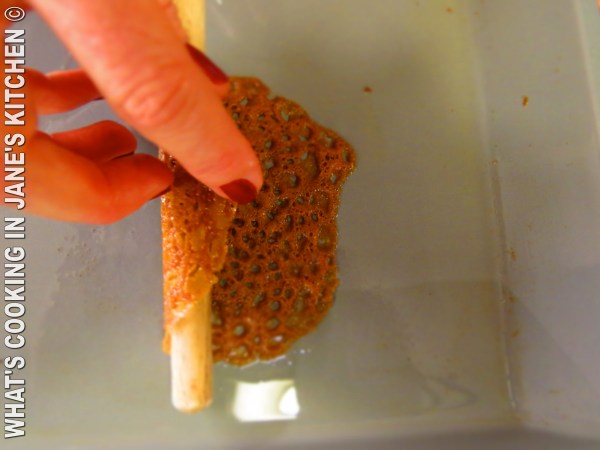
Once your Brandy Snaps are a nice ‘toffee brown’ color after 5-6 minutes, remove baking tray, stand on heat proof mat and wait 1-2 minutes, until you can slide palette knife underneath. This is ‘essential’ to unstick the Brandy Snap first. ( ***At first the Brandy Snap will be too soft to get a knife under.)

With out delay, lift up and over greased spoon handle and carefully roll around giving a gentle squeeze at the end to stick edges. this will take a few tries at first, once you get the knack they come out beautifully.
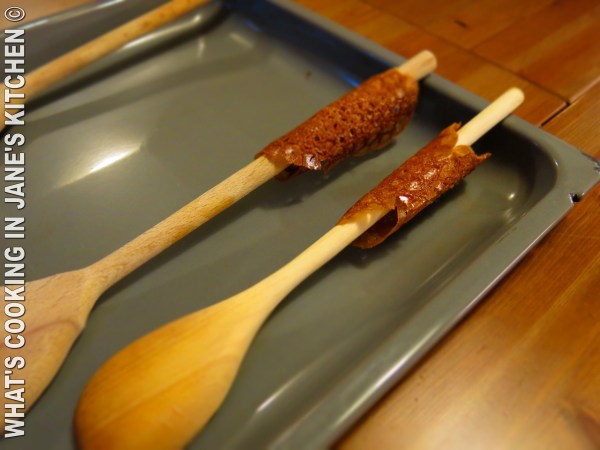
I prefer to leave final edge facing upwards, so that it keeps shape, otherwise if left on the down side it hangs, as you can see in the photograph.
Here I am having another go…….

….they are getting ever better!

……Perfect!!!!!
……last batch…….

….wow becoming a pro!!!!
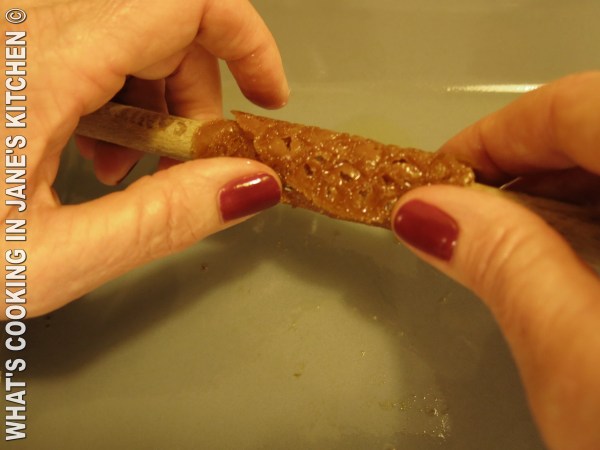
Pressing the edges.
Once cool, gently pull off spoons and leave on wire cake wrack to go completely cold. If not using straight away
store in an airtight container. They keep easily up to a week. Perfect for getting made ahead of time! Once the cream is piped in they will soften after about an hour, so pipe last minute!
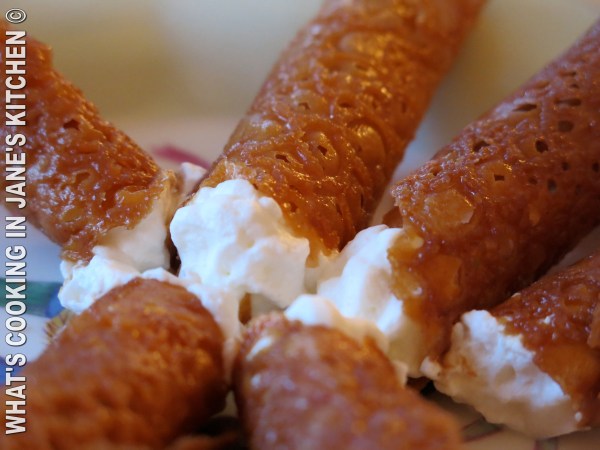
Using a star nozzle piping bag, 20 minutes before using fill with stiffly whipped cream. If wished you can also dip the ends in finely roasted pistachio nuts.
Final result!
Crispy light and delicious!
Chocolate Raspberry And Cream Valentine’s Cake ©
Happy Valentine’s Day !
Click on the link below………

Greek Meatloaf, “Rolo.” ©
There are some recipes that go back to ones childhood and this is one of them. You don’t come across it often these days, unless you are lucky enough to be invited to a home cooked meal and there is nothing better than “Meat Loaf” and mashed potatoes on a cold winters day. When I was a child I used to be fascinated by how the carrot and the egg had got so neatly into the center and I used to make a ‘well’ in the center of my mashed potatoes, in order to hold as much of the delicious sauce as possible.
A generation on, when my middle son was born, the day we returned from the hospital, arrived along side us a gem to help out for the first few weeks. Twenty two years later the gem is still with us! Varvara now nearing 80, has been mother, grandmother, friend and invaluable help ever since. She came through the door like Mary Poppins, coat on and handbag firmly over her arm and as soon as my husband explained we were five in total, including ‘our’ father, that was it, she decided then and there, we were a suitable family. Twice a week we asked if she could come, to help with a little cooking and ironing……..and when no 3 came along and the ironing never seemed to end, we still winked at one another and said laughing, ‘ a little ironing today……’
Amongst other things she is an amazing cook and has taught us all the wonderful delights of Greek cooking.
This I dedicate to her and to my children for whom she is the guiding light and her Greek traditions have been the corner stone of their upbringing, good old fashioned values and always given with warmth, kindness, wisdom and understanding……. and the ever wonderful aromas coming from the kitchen…….
* This is quite a detailed recipe for all my new cooks out there doing it for the first time!

Medium Easy, could be a challenge for some….
Serves 6 persons
Ingredients
1/2 kilo of good quality mince meat. ( No fat )
4 slices of bread cut 2 cm thick
1 onion finely grated
2 tbs finely chopped Mediterranean parsley. ( Flat leaf )
2 eggs for mince
2 hard boiled eggs for center of mince
2 boiled small to medium sized carrot ( One spare )
1-2 tsp salt
Freshly ground black pepper
Olive oil enough to cover a wide saucepan 1 cm deep
25 g butter (Optional)
Plain flour to dust meatloaf
1/2 medium lemon juice
1 tsp “corn” flour ( This is special flour for thickening )
1- 2 tbs brandy
200 ml stock
Garnish
A few sprigs of parsley
Method
1. Place eggs in small saucepans, bring to the boil and cook for five minutes. In a second saucepan place peeled whole carrots, cover with cold water and bring to the boil. Simmer until the carrots fall off the point of a knife when stuck into the thickest part.
2. Slice bread 2 cm thick and leaving crusts on, place in bowl and cover with water. After one minute squeeze out water and place in a clean medium sized bowl.
3. Add mince meat, finely grated onion, finely chopped parsley, add ‘only’ the egg ‘yolks’ and reserve the whites in a separate bowl. Kneed together until smooth.
4. Place flour in roasting tin together with a little salt, enough flour to cover the base of your tin. Once your eggs are cooked, plunge eggs under cold running water for a minute or two, so the yolks don’t get a green sulfur ring around them. Peel and roll in flour along with your boiled carrots. Reserve on clean plate.
5. Divide mince into two and shape into rounds on your chopping board. Flatten out each round and place eggs in a channel shaped by your hand down the center. Do the same with the second round of mince meat, placing your carrot down the center. Now fold mince over eggs and carrot and squeeze mince together so that joins do not show. Shape into a nice oblong shape. ( If it doesn’t work out the first time, do it again, remembering to re-flour your eggs and carrots.
6. Once you have two nice uniform oblongs of mince meat, or perhaps three. (** They are much easier to fry if you keep your loaves small.) Roll the loaves in the flour and then beat the egg whites with a fork and rub over, round and under your two loaves. the egg white helps to seal the meat loaves.
7. In a wide low sided saucepan heat the olive oil/butter over a medium heat until the oil begins to move and make patterns, about two minutes, not so hot that it smokes! Lower your meat loaves in carefully and fry, spooning over the hot oil with a large metallic spoon. Once the underneath has a good crust and is nutty brown in color, (this takes about 5-8 minutes,) turn your loaves over and fry the other side. * Never hurry this process, or the meat loaf will disintegrate, if turned over too soon!
8. Once both your loaves are fried, this can take about 10-15 minutes, remove them from the saucepan and place on clean plate.
9. Drain off most of the oil, return to medium heat and once the oil starts to sizzle déglace with brandy.* When doing this always have the saucepan lid near by in case of fire! The brandy will emulsify with the fat and cooking juices and the alcohol with evaporate. Add the lemon juice which you have previously mixed with the corn flour and 200ml of stock. Using a whisk bring to the boil and simmer for two minutes. The sauce should be thick enough to just coat the back of your spoon. If you need it to be a little thicker add another tsp corn flour, always diluted corn flour first in a little water. Simmer for another two minutes.
10. ‘Sieve’ sauce into a clean wide saucepan and place meat loaves into sauce to simmer gently for 20 minutes. If sauce becomes too thick, add a little more stock.
11. Remove meat loaves. Allow to rest ten minutes or until only just warm and slice into 1 cm slices. If left to go nearly cold, the loaves are even easier to slice, but you will then need to reheat the slices, before pouring over the hot sauce.
* Re-heat by placing in oven proof dish and covering tightly with tin foil. Place in oven 150.C for ten minutes.
12. Decorate with sprigs of parsley and serve with mashed potatoes.
*****Cook’s Tip. The brandy needs to be simmered at least two minutes for the alcohol to evaporate, or it will be bitter. If too lemony add a few grains of sugar, the tip of a teaspoon.

Boil eggs, five minutes after they come to the boil, so that they are hard boiled. Plunge into cold water, so that zinc ring does not form. Boil carrots, (one reserve carrot, incase loaves are more than two.) The first time you make this you want to keep your loaves small for easier frying.

Soak bread slices in water for one minute. Squeeze out water and place in bowl with the rest of your ingredients.
Finely grated onion, egg “yolks” only, reserve whites in separate bowl and parsley.

Add salt and freshly ground pepper.

Knead well until smooth!


Mixture is now well mixed.

Place 2-3 tbs of flour in roasting tin together with a little salt and roll eggs and carrots in the flour. Keep flour to roll your meat loaves in flour too!

Divide your mince meat into two and on your chopping board shape into two or even three small oblong shapes.
If you keep them small, they are much easier to fry. Approximately 15 cm long and 8-10 wide.

Using the length of your hand make an indentation, like a small canal down the center of your oblong. Now lay your carrot along the one and your eggs along the other……..

Carrot laid in canal…..

eggs…….
Now fold mince up and over eggs and pinch mince together, so that the joins do not show. Do the same with the carrots. Shape into a nice even shape.

Place your loaves in the roasting tin with the seasoned flour and flour all over.

Beat your egg whites in a small bowl for a minute.

Now pour and rub over with your fingers the egg white, to cover all sides of your meat loaf.

Once your oil is hot, 2-3 minutes over a medium heat, place loaves into saucepan and fry. Do not be tempted to turn over until the underside is a nutty brown, this takes at least five minutes. If you don’t have a good crust, the loaf will fall apart as you turn it over. While it is frying based with hot oil using a large metal spoon.

Here the loaf has been flipped over.
As these were large loaves they were fried one at a time.

Place on clean plate while you make your sauce.

Pour off most of the oil and butter and place saucepan over a medium heat for no more than one minute. Add brandy.* Always have saucepan lid near by in case of fire! This will emulsify quickly, stir continuously with a balloon whisk for two minutes and then add lemon juice, in which you have dissolved your Corn flour and add stock. Bring to the boil and cook for two to three minutes. Taste for salt and if too lemony add a little more stock.

Strain sauce into a clean wide saucepan, big enough to hold both your meat loaves.

Simmer gently with the lid on for 20-30 minutes. Sauce should be thick enough to just coat the back of your spoon. Adjust with a little stock if necessary.

Remove meat loaves and leave to rest until just warm. This way they are much easier to slice. Cut into 1.5 cm slices. Heat covered with tin foil for ten minutes in oven 150.C and pour over hot sauce.

Final result! Serve with fluffy home made mashed potatoes and the extra sauce on the side.
